Contact
We think you might be interested in Bilfinger %s website.
Otherwise select the country you are interested in here.
+

Flange Face Inspection

Customer:

Anonymous

Location:
DenmarkUnited Kingdom
Scope:

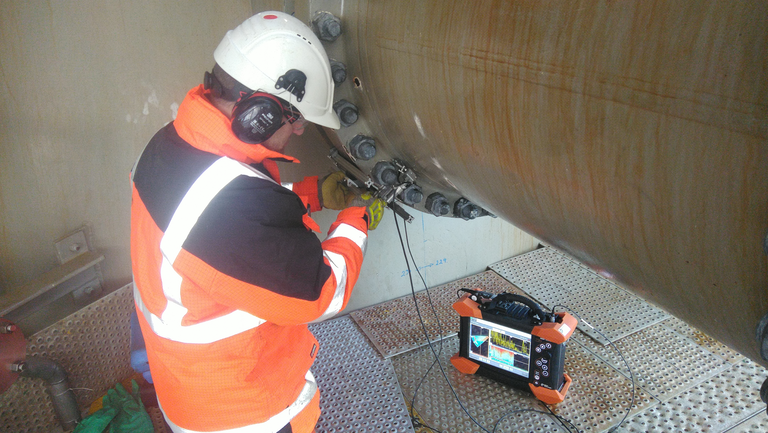
One of our main clients enlisted the services of Bilfinger Danmark A/S to create an automated (NDT) method for assessing the integrity of flange faces while they are in operation. The solution should possess the capability to accurately size anomalies, enabling a thorough fitness for service assessment.

Conventional inspection practices typically involve visual assessments of flange faces and, when necessary, physical measurements of damage. However, such inspections demand the physical disassembly of the flange, necessitating system shutdown. Depending on the pipeline, or vessel, this may even lead to a complete plant shutdown. Therefore, conducting these assessments while the system remains in service can offer substantial benefits in terms of cost efficiency and maintenance planning.

In-service flange face inspection utilising Phased Array Ultrasonics has been utilised for this application for number of years. However the process was manually applied and as such was susceptible to human factors, potentially leading to diminished confidence in the accuracy and repeatability of the technique.</p>

Services:
Inspection

As with most NDT applications, by automating the process, the probability of detection significantly increases. With the added benefit of digitally recording the inspection, results can then be easily shared remotely for enhanced interpretation capabilities. In short, removing some of the limitations caused by human factors.

Leveraging our in-house R&amp;D expertise, an automated and semi-automated flange scanning system was developed in order to effortlessly capture flange inspection data from both the taper and hub sections simultaneously. This bespoke solution not only ensures fully documented inspections, but also reduces inspection time by 33% by simultaneously recording both taper and hub scans.

To enhance the inspection process, Bilfinger Danmark A/S embraced cutting-edge Phased Array technology, incorporating Full Matrix Capture and Total Focussing Methods. This innovative approach vastly improved defect sizing capabilities when compared to the existing Phased Array methods. Furthermore, we introduced a 3D visualisation feature, simplifying the analysis of intricate geometric data. This empowers our clients to effortlessly pinpoint the exact location of detected corrosion.
Added value:

  • No requirement for plant shut down to verify flange integrity
  • Significant cost savings compared to conventional visual inspection approach
  • Inspection time reduced 33% compared to the manual Phased Array approach
  • Confidence in the technique application increased 10 fold with the reduction in human factors influencing the results.
  • Repeatability introduced with digital data files to allow accurate  trending of defects
  • Defect detection increased due to the ability to observe pattern recognition across the full data set of the flange
  • Sizing accuracy increased to allow FFS calculations to be performed. No longer solely a screening technique
captcha
Your message for
captcha